Using Puebla as a reference model allowed me to get the model put together faster. I noticed details in San Pedro Sula that necessitated a change in the Puebla Model as well, so watch for a second draft model there as well.
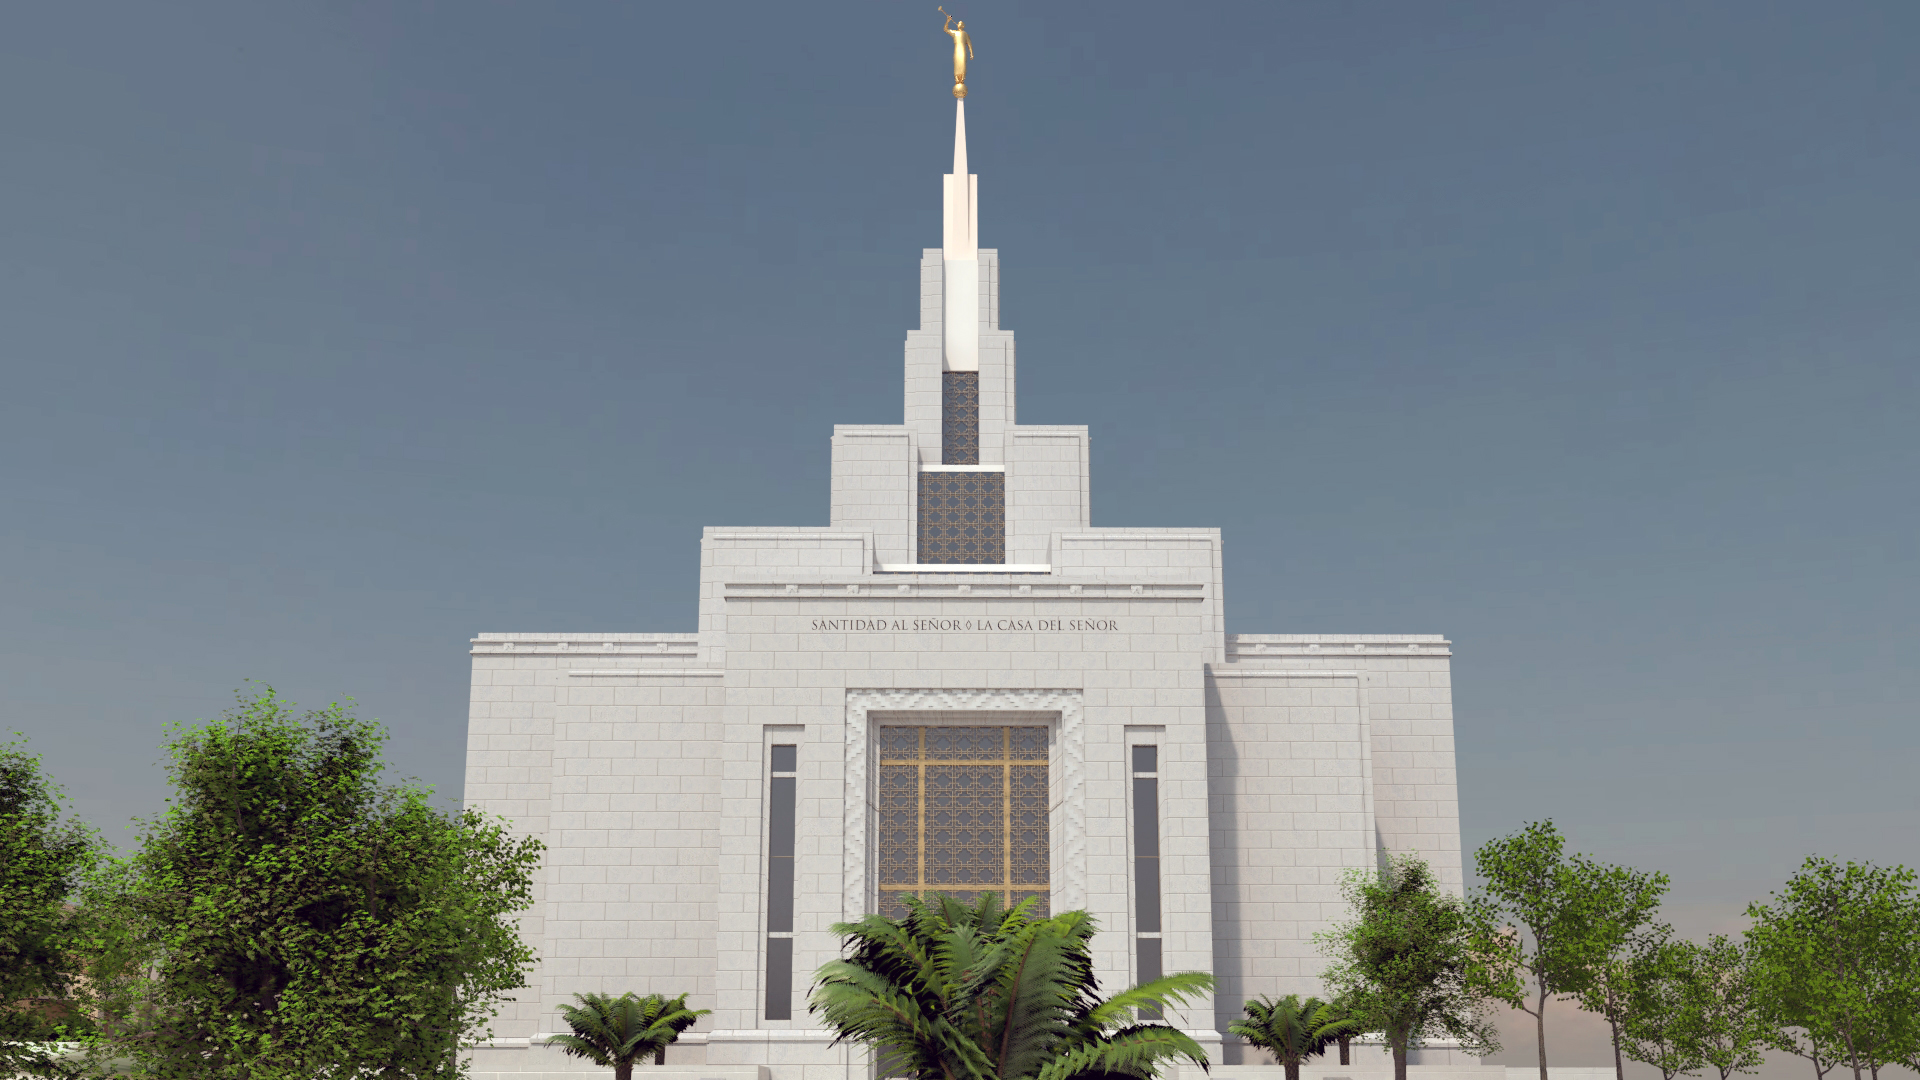
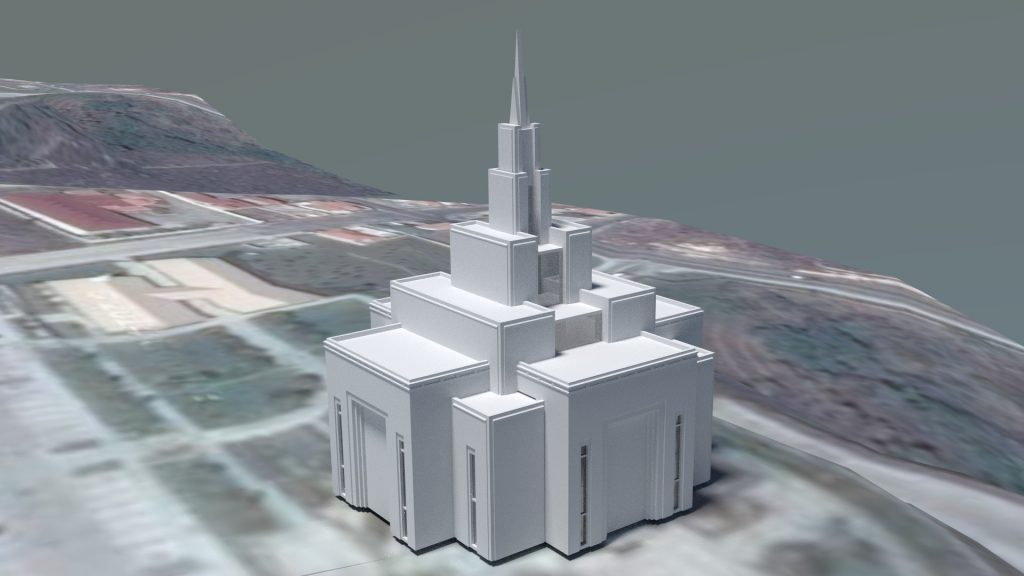
I have uploaded my video for the Tegucigalpa Honduras Temple I meant to upload it yesterday, but life, as they say. The grounds at this temple were challenging, there is much variation, but I think the end result is pretty good.
How would you like to learn a little more about how I make the models?
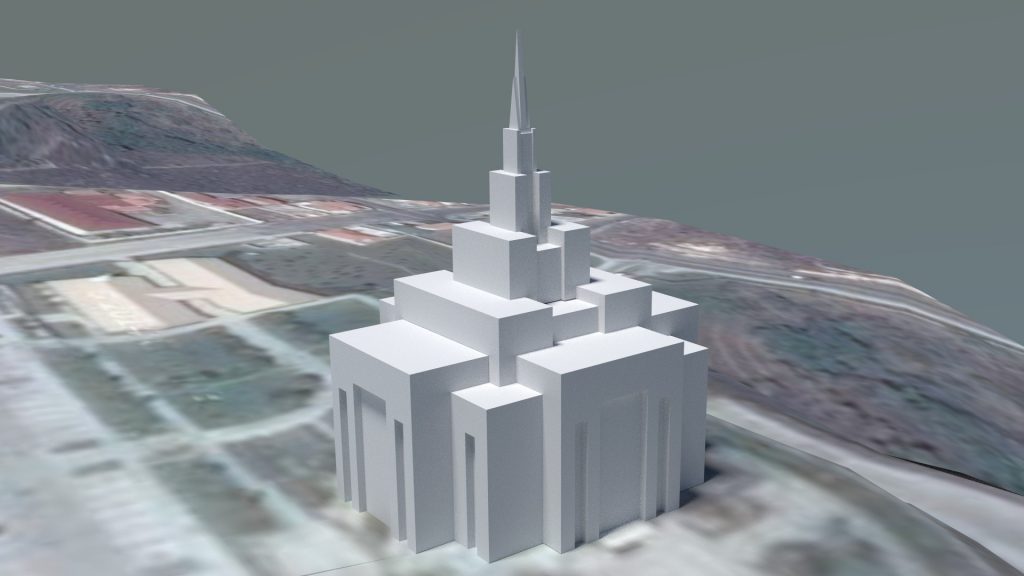
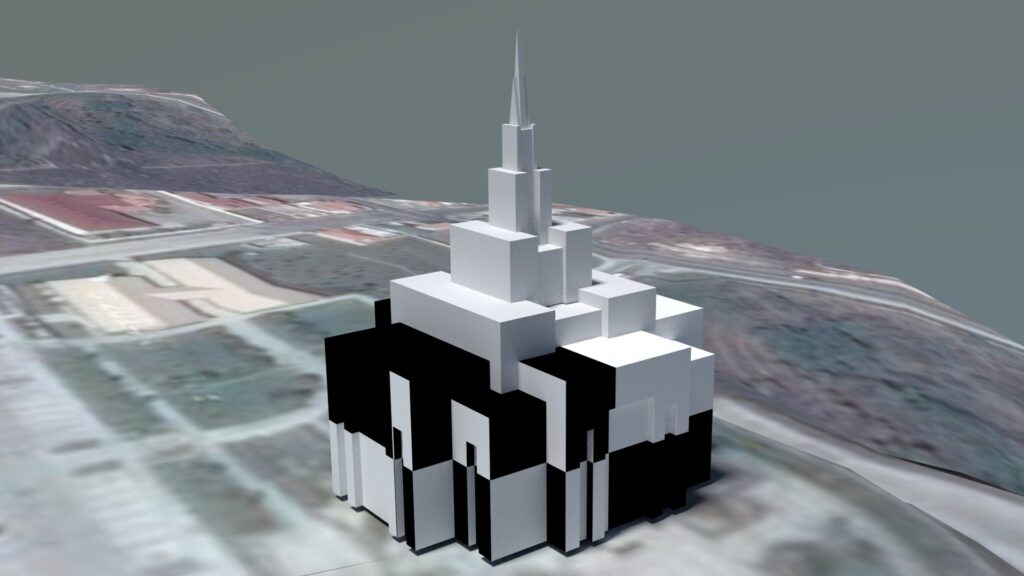
The first thing I do is rough in the shape. I look at photos and maybe find one taken from a distance to estimate the height. This leaves me with the rough in you saw last October:
Next is getting the height more accurate, and getting references for the placement of details. I start by finding a photo like this one from ldschurchtemples.com.
(If I do not have one and neither does ldschurchtemples.com, I will often do a flickr search. for some temples I have spent an hour or two just looking for reference material.)
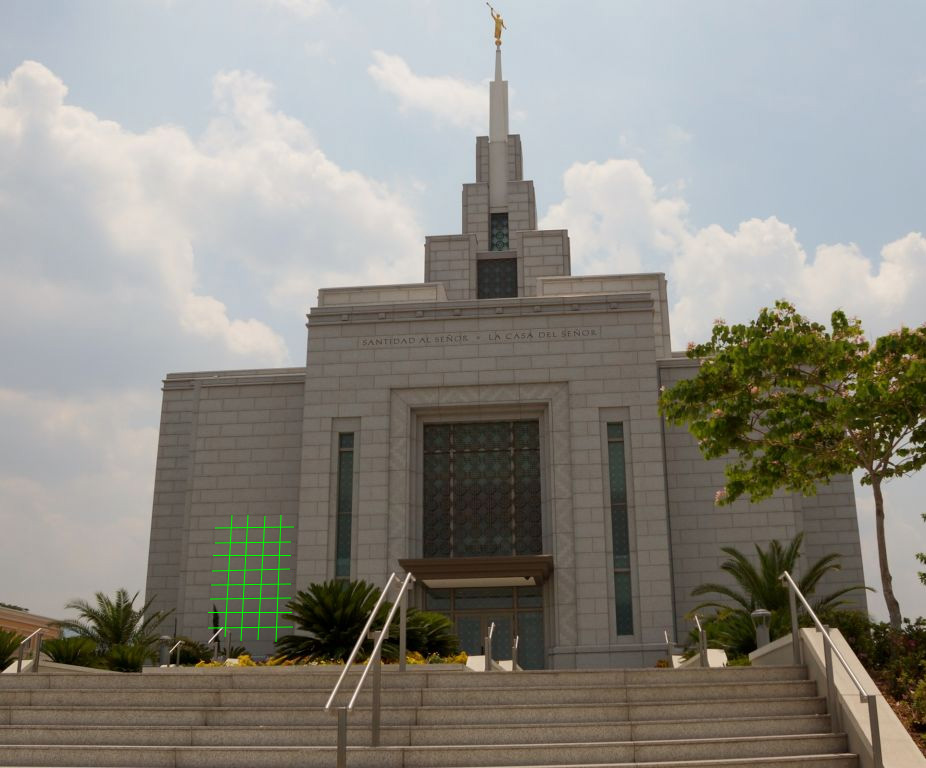
In the above photo, the detail I am looking for is the stone facade. I have not determined yet how tall the watercourse or water table (the row of stones at the bottom that sits directly on or above the footer and often sticks out farther than the rest of the wall to deflect water away from the foundation.) so I will ignore that course of stones and add them on later. The next step? Count the rows (24.5 on the center section.) the bricks are off-set by half a brick, but if you cut one in half, you can see it almost forms a square. (See my grid there on the left. It’s best to check size near the bottom of the wall, as things naturally look shorter as you go higher.
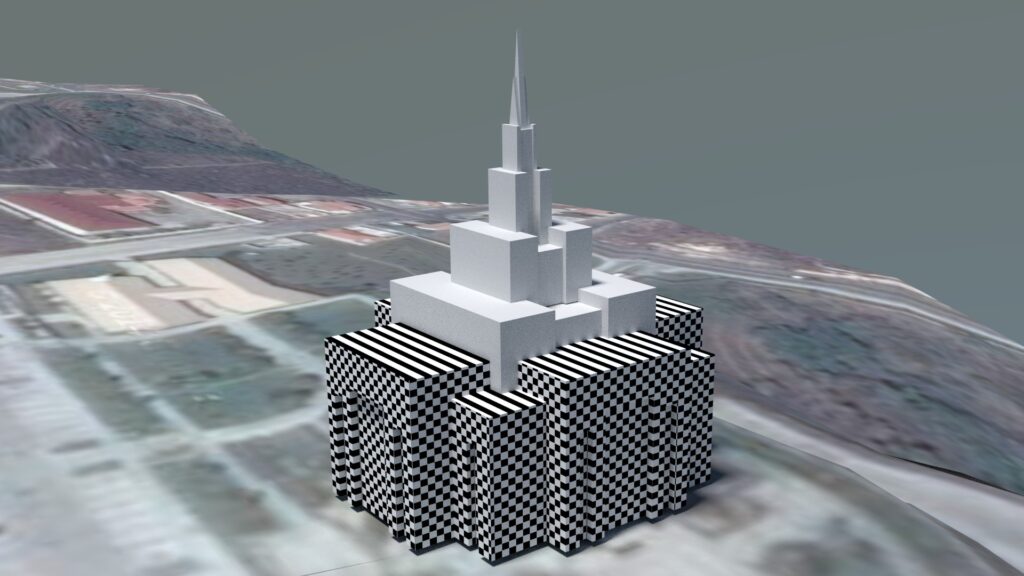
So the whole wall is a grid of squares that are slightly wider than they are tall. I have an image that allows me to make a checkerboard pattern on the wall of my model. It looks like this:
I am going to apply this texture (the name we use for images applied to a surface) to my model:
and scale it the right number of times:
This gives me a grid of 1 brick rows, and .5 brick columns. At this point, I can scale the whole model vertically until the squares become squares instead of rectangles.
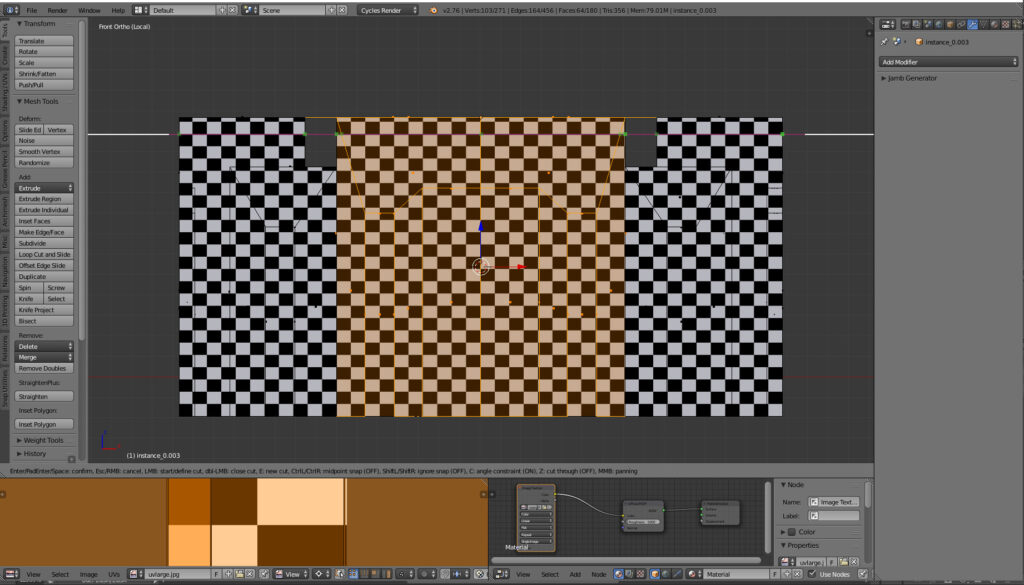
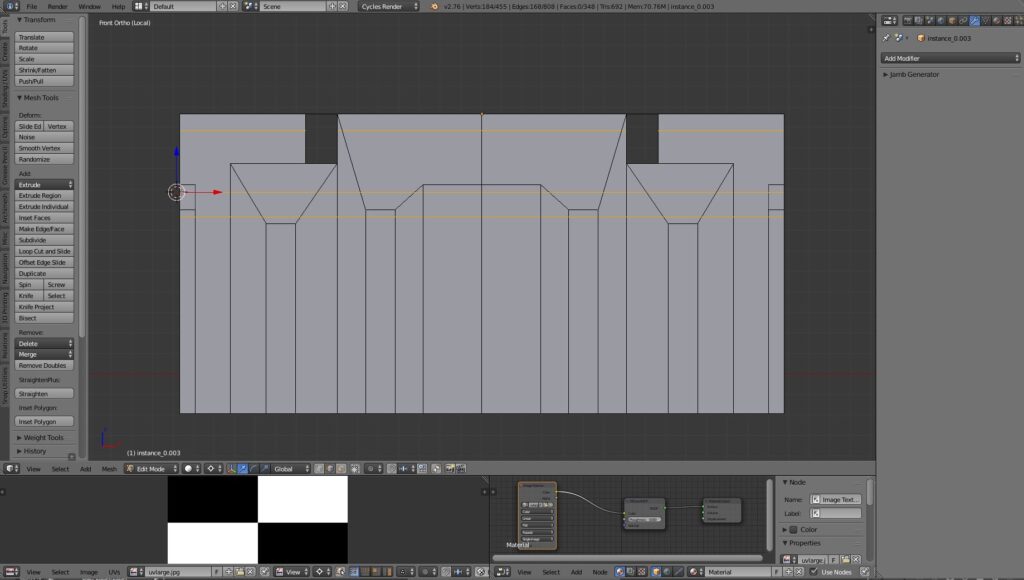
Now to line up the details. Looking back up at the reference photos, you will see there are some decorative features that take up the top row and one half of stone. So I am going to cut a line at the 1.5 mark to make sure I leave room for those.
Then I will count down from that line on the reference photo to find out where the top of the large center window is (5 rows,) and side windows are (7 rows.) Then I make cuts for both of those lines. This leaves me with 3 reference lines. (in orange)
If you are good at picking out details, you will see that I was close but not quite on point for my original rough cuts of the windows, the rectangles that stick up vertically from the base. While you could consider these good enough, most people would be able to tell that something is off when looking at it compared to a photo. Even if they can’t tell what. So I want to be as close as possible.
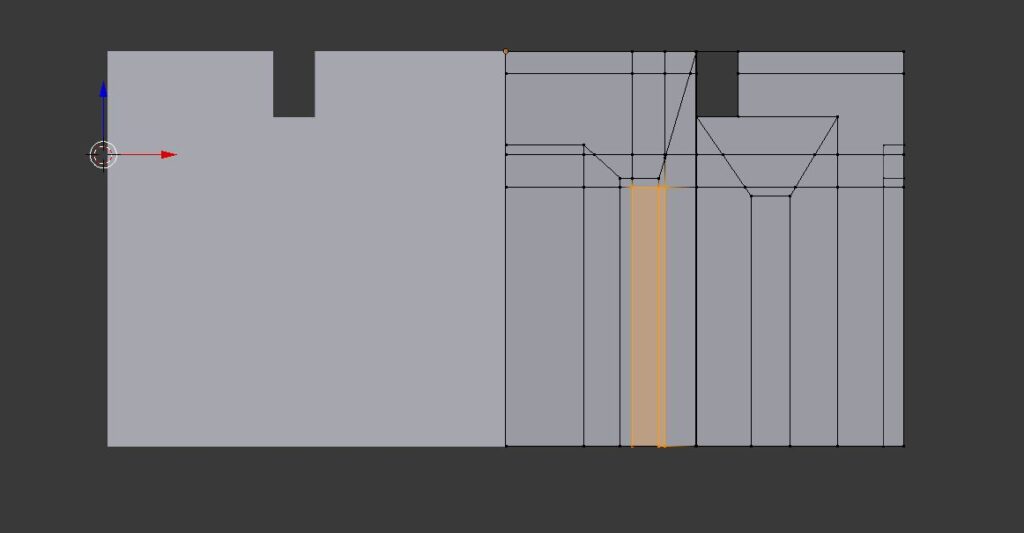
Now I want to count over from the sides to find out where the left and right edges of all the windows fall on that center section. This is harder, as they don’t always line up with a brick edge. Now I have to estimate. For the short windows, one edge appears to be at 1.6 columns, and the next edge is at 3.3 columns. So I cut new lines. I am going to do this for just the right side of the center section. Then I will use a feature called mirror to make sure that Blender automatically copies the edits not only to the left side but the back side of the model as well. Here you see that I can now only edit the right side of the model. Everything I do here will automatically happen on the left as well. This works great until I have to add the doors, which are only on one side. That’s when I will turn off the mirror and go back to editing the whole building. You can see my new short window space in orange. The original rough is to the left and slightly taller than it. Next I need to re cut the shape for the Tall window, using the same procedure. Count the columns, cut new lines, then pull out the new shapes. This gives me the shape I want, but leaves things an absolute mess of angles lines and faces that are unnecessary:
I like to keep things clean, mainly because it’s easy to get confused the more complex a model gets. It gets hard to find the specific point you are looking for, so i will use Blender’s built in tools to reduce all these triangles just to the lines I actually need (Including the reference lines.)
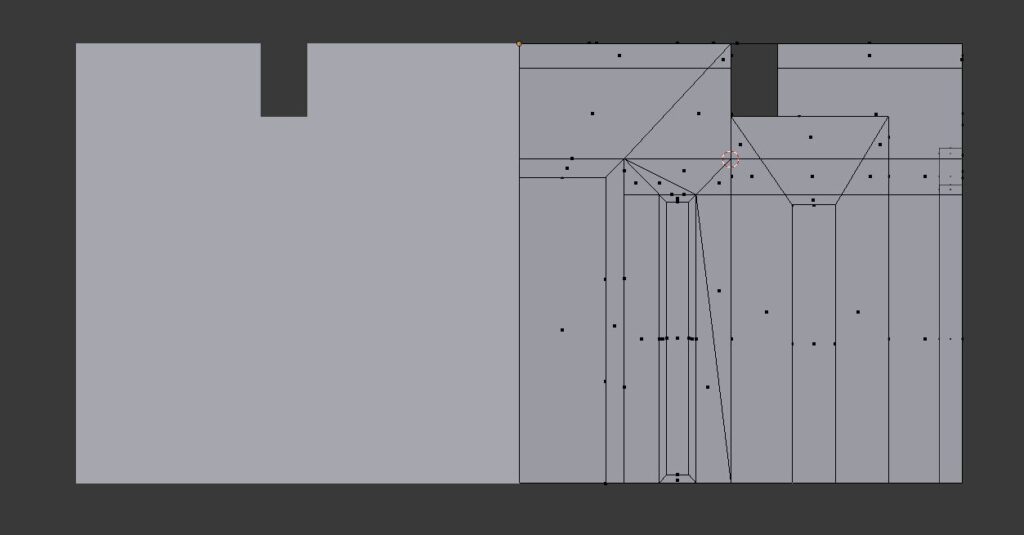
The shape is starting to become visible in the way certain shapes are outlined. From here it’s more details. This process goes easiest if I make ans many details as possible in one spot, then copy around to areas that are the same or are similar enough that they only need minor adjustments. By copying The model comes together really quick:
After that I make sure the grounds are right. This will help me verify the width and length are right, then start adding in the textures.